Zurück zu den Vorlagen
Tiefsee-Fisch Steinmalerei
Benötigte Materialien
- Glatter, länglicher flacher Stein
- Schwarze Acrylfarbe
- Dunkelblaue Acrylfarbe
- Weiße Acrylfarbe
- Gelbe Acrylfarbe
- Blaue Acrylfarbe
- Flacher Pinsel (mittelgroß)
- Feiner Detailpinsel
- Klarlackspray
Schritt-für-Schritt-Anleitung
1
Schritt 1: Paint the pitch-dark abyss
Wash and dry your rock. Paint the entire surface with near-black. While still wet, blend in deep navy blue in the upper areas to suggest the water column — darker at the bottom (deepest water) and slightly less dark higher up. The abyssal zone has no sunlight at all. Add a few scattered pinpoints of light for bioluminescent particles in the water column.
2
Schritt 2: Sketch and paint the angler fish body
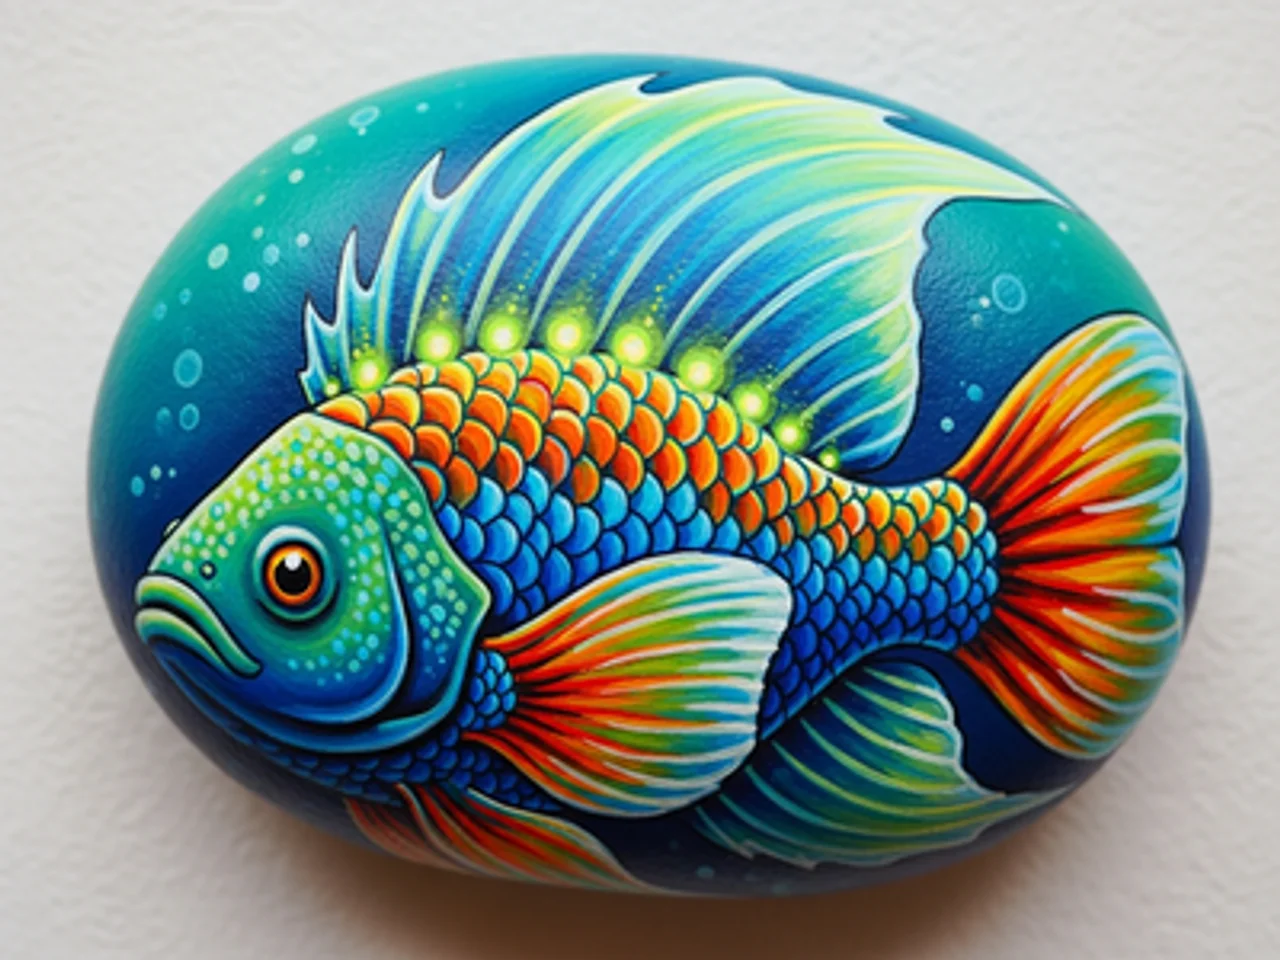
Sketch an anglerfish (deep sea fish) body — a wide, rounded head taking up most of the body, with a tapering tail. The anglerfish is the most recognizable deep sea creature. Paint the body in deep teal or dark gray-blue. Add a large, gaping mouth with massive jagged teeth in white — the teeth are a hallmark feature.
3
Schritt 3: Paint the bioluminescent lure
On the top of the anglerfish's head, paint a long spine (illicium) extending forward and curving down in front of the mouth. At the tip, paint a small glowing bulb in bright cyan or neon blue-green with a white core. This is the esca — the bioluminescent lure the anglerfish uses to attract prey in the darkness.
4
Schritt 4: Add bioluminescent body markings
Using neon green or bright cyan paint and a fine brush, add a series of glowing spots and curving line patterns along the body and fins of the anglerfish. These bioluminescent patterns suggest the photophores (light-producing organs) that many deep sea creatures use for communication and camouflage.
5
Schritt 5: Add the glowing eye and seal
Paint a large, haunting deep-sea eye on the side of the anglerfish head — a wide greenish iris surrounding a large black pupil with a tiny white highlight. Add a glow halo around the entire fish using very diluted cyan paint. Apply gloss sealant. The wet, shiny finish makes the fish look submerged in water.
Schritt 6: RoxGeo-Code hinzufügen
Schreibe auf die Unterseite oder Rückseite deines Steins ROXGEO.COM gefolgt von einem Schrägstrich und dem einzigartigen Code deines Steins (z.B. ROXGEO.COM/ABC123). So kann der Finder direkt zur Profilseite deines Steins gelangen und seinen Fund protokollieren. Wenn der Stein zu klein für die vollständige Adresse ist, schreibe #ROX gefolgt vom Code ohne Leerzeichen (z.B. #ROXABC123) – das ist kurz, leicht bei Google zu suchen und führt direkt zur Reiseseite deines Steins. Verwende einen feinen wasserfesten Stift oder Acryl-Farbstift und versiegle ihn mit Klarlack, damit der Code durch Regen, Sonne und Abenteuer lesbar bleibt.
Hilfreiche Tipps
- Wähle eine Steinform, die zu deinem Motiv passt.
- Zeichne das Motiv mit Bleistift vor, bevor du anfängst zu malen.
- Lass jede Schicht vollständig trocknen, bevor du die nächste aufträgst.
- Versiegle mit Klarlackspray, damit dein Stein auch draußen schön bleibt.
- Für den RoxGeo-Code auf der Unterseite verwende einen wasserfesten Permanentmarker (wie Sharpie) oder einen Acryl-Farbstift. Trage 2–3 Schichten klare Versiegelung über dem Code auf – das hält ihn monatelang durch Regen, Sonne und Anfassen lesbar.
- #ROXCODE (z.B. #ROXABC123) auf deinen Stein zu schreiben macht es einfach, ihn über Google zu finden. Wir optimieren aktiv für diesen Hashtag, sodass jeder, der danach sucht, die Profilseite deines Steins schnell findet.
- Die vollständige Adresse ROXGEO.COM/CODE bringt den Finder direkt zur Karte deines Steins, wo er die vollständige Reisehistorie, vorherige Finder und Fotos von jeder Station seiner Reise sehen kann.
Male diesen Stein und verfolge seine Reise mit RoxGeo!
RoxGeo kostenlos herunterladen