Zurück zu den Vorlagen
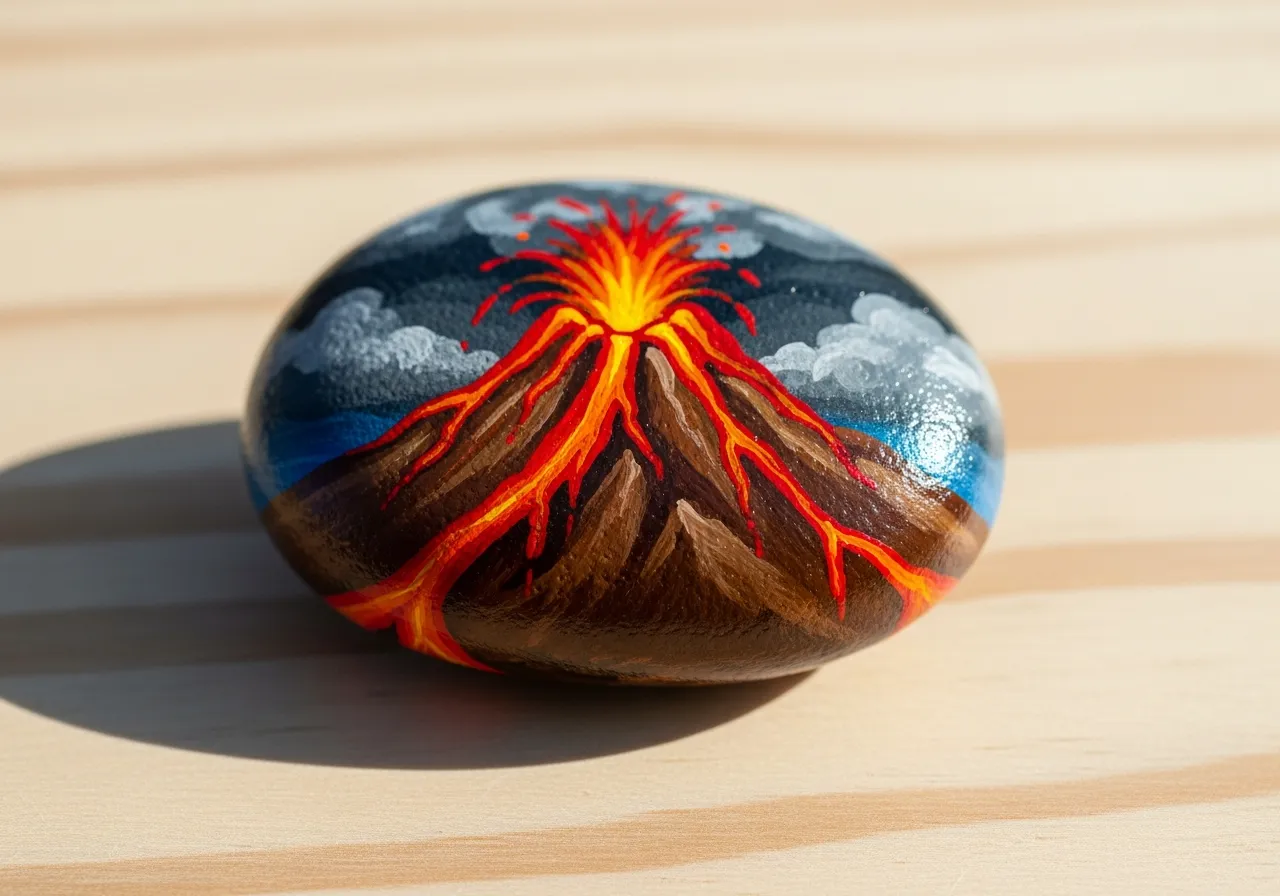
Vulkan Steinmalerei
Benötigte Materialien
- Hoher, ovaler Stein
- Braune Acrylfarbe
- Orange Acrylfarbe
- Rote Acrylfarbe
- Schwarze Acrylfarbe
- Gelbe Acrylfarbe
- Flacher Pinsel (mittelgroß)
- Feiner Detailpinsel
- Klarlackspray
Schritt-für-Schritt-Anleitung
1
Schritt 1: Prepare and sketch
Wash and dry your rock. A triangular or cone-shaped rock works best for a volcano. Use a pencil to divide the rock into sections: the mountain base (bottom two-thirds) and the eruption area (top third).
2
Schritt 2: Paint the mountain
Paint the lower portion of the rock with brown paint. Add darker brown or gray streaks along the sides to create depth and rocky texture. Blend the colors slightly where they meet for a natural look.
3
Schritt 3: Create the lava flow
Starting from the top of the rock, paint streams of red and orange flowing down the sides. Make the lava thicker at the top and thinner as it flows down. Add yellow highlights in the center of the lava streams for a glowing effect.
4
Schritt 4: Paint the eruption
At the very top, paint a bright explosion of yellow and orange bursting upward. Add small red and orange dots flying outward from the crater to represent volcanic debris. Use black to outline the crater opening.
5
Schritt 5: Add details and seal
Add smoke wisps with light gray paint above the eruption. Paint a few small rocks or boulders at the base using dark gray. Once fully dry, apply clear sealant to preserve your erupting volcano.
Schritt 6: RoxGeo-Code hinzufügen
Schreibe auf die Unterseite oder Rückseite deines Steins ROXGEO.COM gefolgt von einem Schrägstrich und dem einzigartigen Code deines Steins (z.B. ROXGEO.COM/ABC123). So kann der Finder direkt zur Profilseite deines Steins gelangen und seinen Fund protokollieren. Wenn der Stein zu klein für die vollständige Adresse ist, schreibe #ROX gefolgt vom Code ohne Leerzeichen (z.B. #ROXABC123) – das ist kurz, leicht bei Google zu suchen und führt direkt zur Reiseseite deines Steins. Verwende einen feinen wasserfesten Stift oder Acryl-Farbstift und versiegle ihn mit Klarlack, damit der Code durch Regen, Sonne und Abenteuer lesbar bleibt.
Hilfreiche Tipps
- Wähle eine Steinform, die zu deinem Motiv passt.
- Zeichne das Motiv mit Bleistift vor, bevor du anfängst zu malen.
- Lass jede Schicht vollständig trocknen, bevor du die nächste aufträgst.
- Versiegle mit Klarlackspray, damit dein Stein auch draußen schön bleibt.
- Für den RoxGeo-Code auf der Unterseite verwende einen wasserfesten Permanentmarker (wie Sharpie) oder einen Acryl-Farbstift. Trage 2–3 Schichten klare Versiegelung über dem Code auf – das hält ihn monatelang durch Regen, Sonne und Anfassen lesbar.
- #ROXCODE (z.B. #ROXABC123) auf deinen Stein zu schreiben macht es einfach, ihn über Google zu finden. Wir optimieren aktiv für diesen Hashtag, sodass jeder, der danach sucht, die Profilseite deines Steins schnell findet.
- Die vollständige Adresse ROXGEO.COM/CODE bringt den Finder direkt zur Karte deines Steins, wo er die vollständige Reisehistorie, vorherige Finder und Fotos von jeder Station seiner Reise sehen kann.
Male diesen Stein und verfolge seine Reise mit RoxGeo!
RoxGeo kostenlos herunterladen