Takaisin malleihin
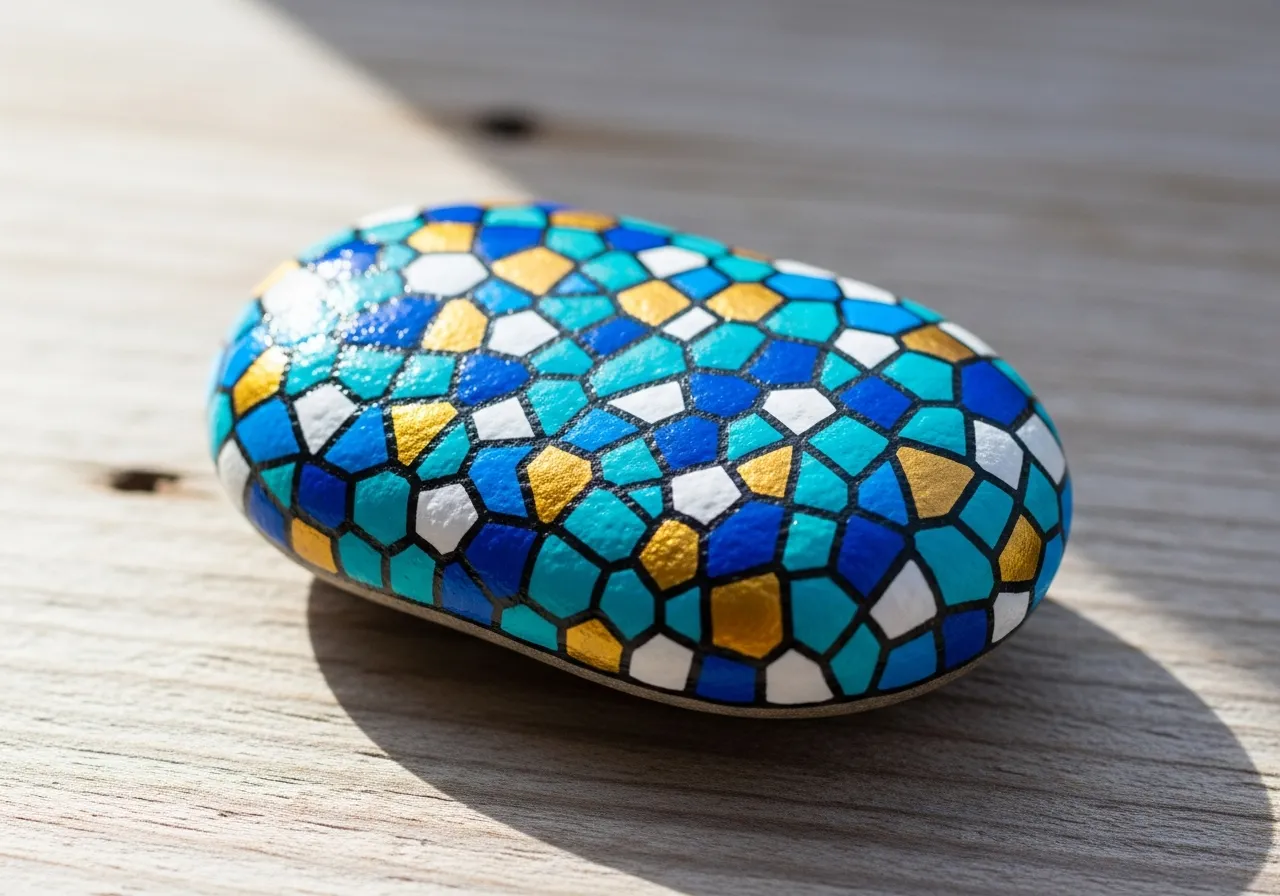
Pilkkukuvio Kivimaalaus
Tarvittavat materiaalit
- Sileä, pyöreä kivi (kämmentäyttävä)
- Erilaiset kirkkaat akryylivärit
- Valkoinen akryylimaali
- Vanupuikot tai pyöreät siveltimät (pisteisiin)
- Litteä sivellin (keskikokoinen)
- Kirkas lakkasuihke
- Paperilautanen (paletin tilalla)
- Sanomalehti tai muovikalvo (suojaamiseen)
Vaiheittaiset ohjeet
1
Vaihe 1: Prepare the rock
Wash your rock with soap and water and let it dry completely. Paint the entire surface with white acrylic paint as a base coat. Let it dry fully before moving on.
2
Vaihe 2: Choose your colors
Pick 4 to 6 bright colors for your dots. Squeeze a small amount of each color onto your paper plate palette. Arrange them so they are easy to reach.
3
Vaihe 3: Start dotting
Dip a cotton swab or the round end of a brush into paint and press it firmly onto the rock to create a perfect circle. Start with the largest dots first, spacing them evenly across the rock.
4
Vaihe 4: Fill in the gaps
Add smaller dots in different colors between the larger dots. Use a thinner tool for tiny dots. Mix and match colors for a fun, playful pattern. Cover as much of the white background as you like.
5
Vaihe 5: Seal and display
Let all the dots dry completely. Spray with clear sealant to protect your colorful creation. Your polka dot rock is ready to brighten up any garden or shelf!
Vaihe 6: Lisää RoxGeo-koodi
Kirjoita kiven ala- tai takaosaan ROXGEO.COM, jota seuraa vinoviiva ja kiven yksilöllinen koodi (esim. ROXGEO.COM/ABC123). Näin etsijä voi mennä suoraan kivisi profiilisivulle ja kirjata löytönsä. Jos kivi on liian pieni koko osoitteeseen, kirjoita #ROX ja sen jälkeen koodi ilman välilyöntejä (esim. #ROXABC123) – se on lyhyt, helppo hakea Googlesta ja johtaa suoraan kiven matkasivulle. Käytä hienokärkistä pysyvää tussia tai akryylimaalikynää ja sulje se kirkkaalla lakalla, jotta koodi pysyy luettavissa sateen, auringon ja seikkailujen läpi.
Hyödyllisiä vinkkejä
- Valkoinen pohjakerros saa kaikki värit näyttämään eloisammilta.
- Anna jokaisen kerroksen kuivua kokonaan ennen seuraavan lisäämistä.
- Valitse kivimuoto, joka sopii aiheeseesi.
- Suojaa kirkaslakkasuihkeella, jotta kivi pysyy kauniina ulkona.
- Käytä pohjassa olevaa RoxGeo-koodia varten vedenpitävää pysyvää merkkiä (kuten Sharpie) tai akryylivärikynää. Levitä 2–3 kerrosta kirkasta tiivisteainetta koodin päälle – tämä pitää sen luettavana sateessa, auringonpaisteessa ja käsittelyssä kuukausien ajan.
- Kun kirjoitat kivellesi #ROXCODE (esim. #ROXABC123), se on helppo löytää Google-haun kautta. Optimoimme aktiivisesti tälle hashtagille, joten jokainen sitä etsivä löytää kivisi profiilisivun nopeasti.
- Täysi osoite ROXGEO.COM/CODE vie etsijän suoraan kiven kortille, jossa hän näkee sen koko matkahistorian, aiemmat löytäjät ja valokuvat jokaiselta matkan pysäkiltä.
Maalaa tämä kivi ja seuraa sen matkaa RoxGeolla!
Lataa RoxGeo ilmaiseksi