Վերադարձ դեպի Կաղապարներ
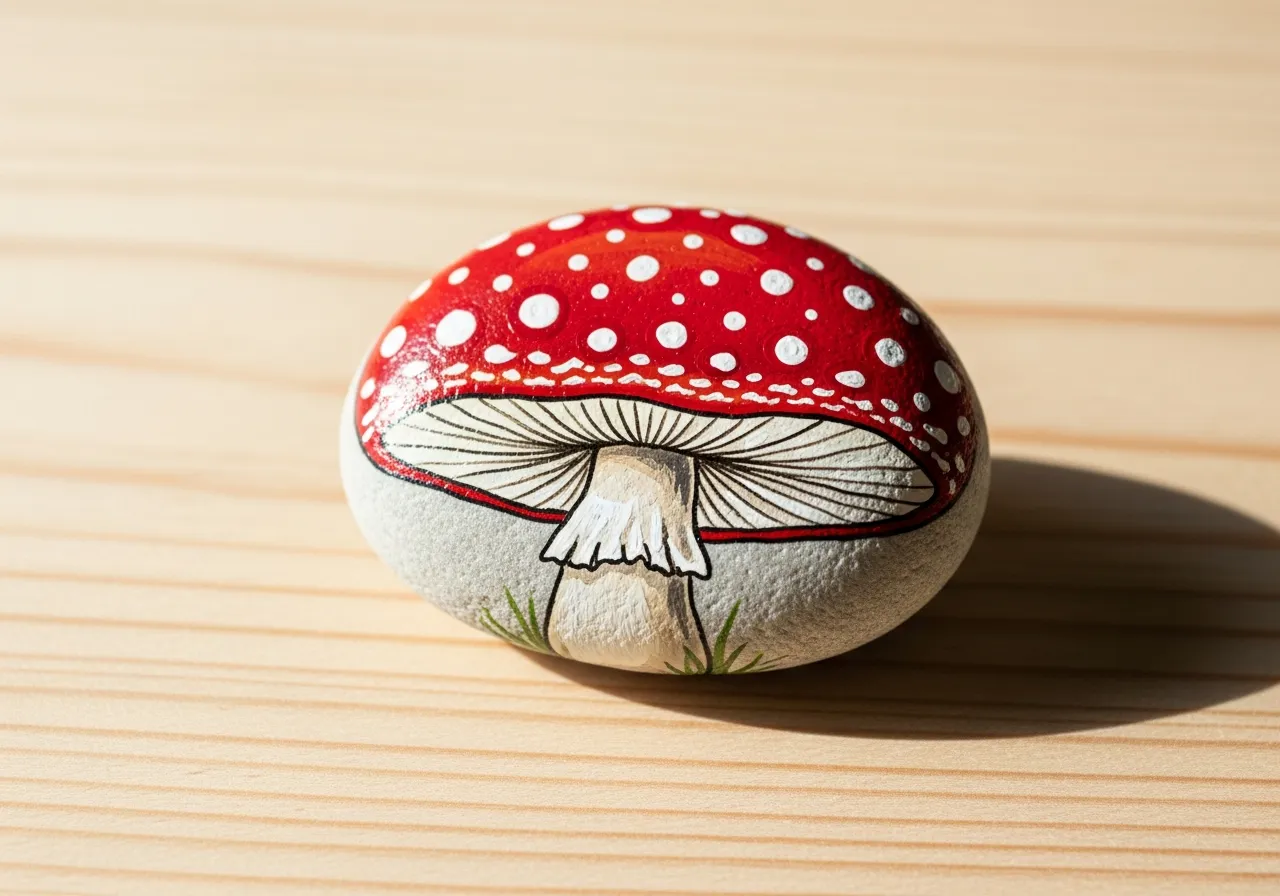
Սնկի Քարի Նկարչություն
Պահանջվող նյութեր
- Կլորավուն, գմբեթաձև քար
- Կարմիր ակրիլային ներկ
- Սպիտակ ակրիլային ներկ
- Շագանակագույն ակրիլային ներկ
- Կանաչ ակրիլային ներկ
- Հարթ վրձին (միջին)
- Բարակ մանրամասների վրձին
- Թափանցիկ լաք սփրեյ
Քայլ առ քայլ հրահանգներ
1
Քայլ 1: Prepare the rock
Wash your rock with soap and water and let it dry completely. A round or slightly dome-shaped rock works best for a mushroom. Cover your workspace with newspaper.
2
Քայլ 2: Paint the mushroom cap
Paint the upper two-thirds of the rock with red acrylic paint. Apply two coats for a rich, even color. The dome shape of the rock will naturally look like a mushroom cap.
3
Քայլ 3: Add white dots
Once the red paint is dry, dip the end of your brush handle or a pencil eraser in white paint and stamp round dots across the red cap. Space them randomly for a natural toadstool look.
4
Քայլ 4: Paint the stem
Paint the lower third of the rock white or light beige for the mushroom stem. Keep the border between the cap and stem neat. You can add a small curved line for the stem ring.
5
Քայլ 5: Add details and seal
Optionally add tiny green grass blades at the base with green paint. Once everything is dry, spray with clear sealant to protect your mushroom rock from the weather.
Քայլ 6: Ավելացնել RoxGeo կոդը
Ձեր ժայռի ներքևի կամ հետևի մասում գրեք ROXGEO.COM, որին հաջորդում է կտրվածք և ձեր ժայռի եզակի կոդը (օրինակ՝ ROXGEO.COM/ABC123): Սա հնարավորություն է տալիս որոնողին ուղղակիորեն գնալ ձեր ժայռի պրոֆիլի էջ և գրանցել իր հայտնագործությունը: Եթե ժայռը չափազանց փոքր է ամբողջական հասցեի համար, գրեք #ROX, որին հաջորդում է ծածկագիրը՝ առանց բացատների (օրինակ՝ #ROXABC123), այն կարճ է, հեշտ է որոնել Google-ում և ուղիղ դեպի ձեր ժայռի ճամփորդության էջը: Օգտագործեք նուրբ ծայրով մշտական մարկեր կամ ակրիլային ներկի գրիչ և փակեք այն թափանցիկ լաքով, որպեսզի ծածկագիրը ընթեռնելի մնա անձրևի, արևի և արկածների ժամանակ:
Օգտակար խորհուրդներ
- Ընտրի՛ր այնպիսի քար, որի ձևը համապատասխանում է քո մոտիվին։
- Սպիտակ հիմնական շերտը կօգնի, որ բոլոր գույներն ավելի վառ երևան։
- Թող յուրաքանչյուր շերտը ամբողջովին չորանա, նախքան հաջորդը քսելը։
- Ծածկի՛ր թափանցիկ սփրեյով, որպեսզի քարը պաշտպանված և գեղեցիկ մնա։
- Ներքևում գտնվող RoxGeo կոդի համար օգտագործեք անջրանցիկ մշտական մարկեր (ինչպես Sharpie) կամ ակրիլային ներկի գրիչ: Կոդերի վրա քսեք 2-3 շերտ թափանցիկ հերմետիկ նյութ, որն այն ընթեռնելի է պահում անձրևի, արևի և բեռնաթափման ժամանակ ամիսներ շարունակ:
- Ձեր քարի վրա #ROXCODE (օրինակ՝ #ROXABC123) գրելը հեշտացնում է այն գտնելը Google-ի որոնման միջոցով: Մենք ակտիվորեն օպտիմիզացնում ենք այս հեշթեգը, այնպես որ յուրաքանչյուրը, ով որոնում է այն, արագ կգտնի ձեր ռոքի պրոֆիլի էջը:
- Ամբողջական ROXGEO.COM/CODE հասցեն որոնողին տանում է անմիջապես ձեր ժայռի քարտը, որտեղ նրանք կարող են տեսնել նրա ճանապարհորդության ամբողջական պատմությունը, նախորդ որոնողներին և լուսանկարները ճանապարհորդության յուրաքանչյուր կանգառից:
Ներկիր այս ժայռը և հետևիր նրա ճանապարհորդությանը RoxGeo-ի հետ:
Ներբեռնեք RoxGeo անվճար


