العودة إلى القوالب
رسم سمكة أعماق البحر على الحجر
المواد المطلوبة
- حجر مستطيل ومسطح
- طلاء أكريليك أسود
- طلاء أكريليك أزرق غامق
- طلاء أكريليك أبيض
- طلاء أكريليك أصفر
- طلاء أكريليك أزرق
- فرشاة مسطحة متوسطة
- فرشاة رفيعة للتفاصيل
- بخاخ طلاء شفاف
تعليمات خطوة بخطوة
1
خطوة 1: Paint the pitch-dark abyss
Wash and dry your rock. Paint the entire surface with near-black. While still wet, blend in deep navy blue in the upper areas to suggest the water column — darker at the bottom (deepest water) and slightly less dark higher up. The abyssal zone has no sunlight at all. Add a few scattered pinpoints of light for bioluminescent particles in the water column.
2
خطوة 2: Sketch and paint the angler fish body
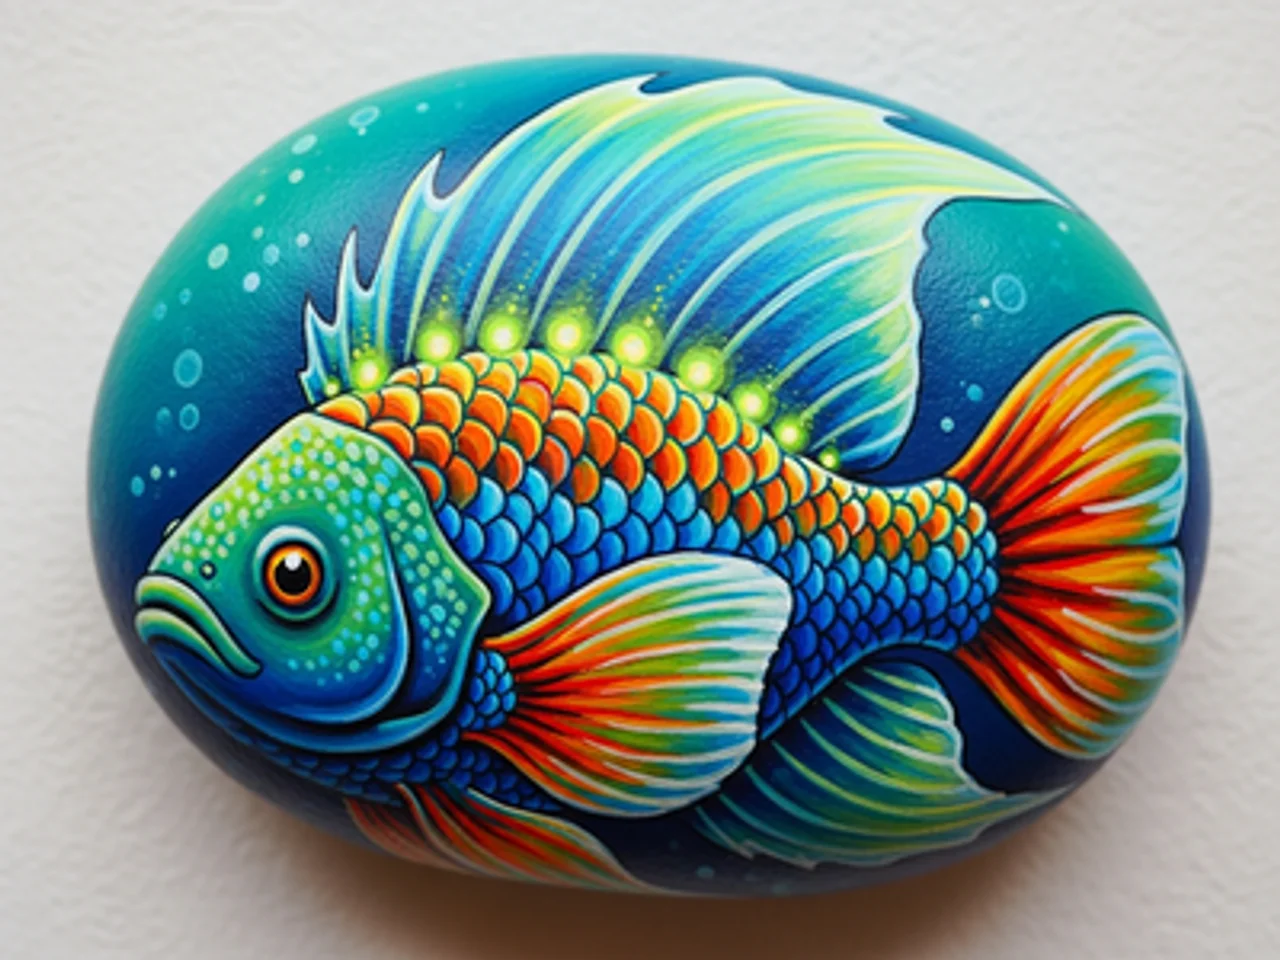
Sketch an anglerfish (deep sea fish) body — a wide, rounded head taking up most of the body, with a tapering tail. The anglerfish is the most recognizable deep sea creature. Paint the body in deep teal or dark gray-blue. Add a large, gaping mouth with massive jagged teeth in white — the teeth are a hallmark feature.
3
خطوة 3: Paint the bioluminescent lure
On the top of the anglerfish's head, paint a long spine (illicium) extending forward and curving down in front of the mouth. At the tip, paint a small glowing bulb in bright cyan or neon blue-green with a white core. This is the esca — the bioluminescent lure the anglerfish uses to attract prey in the darkness.
4
خطوة 4: Add bioluminescent body markings
Using neon green or bright cyan paint and a fine brush, add a series of glowing spots and curving line patterns along the body and fins of the anglerfish. These bioluminescent patterns suggest the photophores (light-producing organs) that many deep sea creatures use for communication and camouflage.
5
خطوة 5: Add the glowing eye and seal
Paint a large, haunting deep-sea eye on the side of the anglerfish head — a wide greenish iris surrounding a large black pupil with a tiny white highlight. Add a glow halo around the entire fish using very diluted cyan paint. Apply gloss sealant. The wet, shiny finish makes the fish look submerged in water.
خطوة 6: أضف رمز RoxGeo
على الجزء السفلي أو الخلف من صخرتك، اكتب ROXGEO.COM متبوعًا بشرطة مائلة ورمز صخرتك الفريد (مثل ROXGEO.COM/ABC123). هذا يسمح للعثور على الذهاب مباشرة إلى صفحة ملف صخرتك وتسجيل اكتشافهم. إذا كانت الصخرة صغيرة جدًا لعنوان كامل، اكتب #ROX متبوعًا بالرمز بدون مسافات (مثل #ROXABC123) — إنه قصير، وسهل البحث عنه على Google، ويقود مباشرة إلى صفحة رحلة صخرتك. استخدم قلم تحديد دائم ذو طرف رفيع أو قلم طلاء أكريليك، وقم بتغطيته بطلاء شفاف حتى يبقى الرمز مقروءًا خلال المطر، والشمس، والمغامرة.
نصائح مفيدة
- اختر شكل الحجر الذي يناسب تصميمك.
- ارسم التصميم بالقلم الرصاص قبل البدء بالطلاء.
- دع كل طبقة تجف تمامًا قبل إضافة التالية.
- اختم بالبخاخ الشفاف لحماية الحجر في الخارج أيضًا.
- لرمز RoxGeo في الأسفل، استخدم قلم تحديد دائم مقاوم للماء (مثل Sharpie) أو قلم طلاء أكريليك. ضع 2-3 طبقات من مادة مانعة للتسرب الشفافة فوق الرمز — هذا يحافظ على قابليته للقراءة خلال المطر، والشمس، والتعامل معه لعدة أشهر.
- كتابة #ROXCODE (مثل #ROXABC123) على صخرتك يجعل من السهل العثور عليها عبر بحث Google. نحن نقوم بتحسين هذا الهاشتاج بنشاط، لذا أي شخص يبحث عنه سيجد صفحة ملف صخرتك بسرعة.
- العنوان الكامل ROXGEO.COM/CODE يأخذ العاثر مباشرة إلى بطاقة صخرتك، حيث يمكنهم رؤية تاريخ سفرها الكامل، والعثورين السابقين، والصور من كل محطة في رحلتها.
قم برسم هذه الصخرة وتتبع رحلتها مع RoxGeo!
قم بتنزيل RoxGeo مجاناً