Volver a plantillas
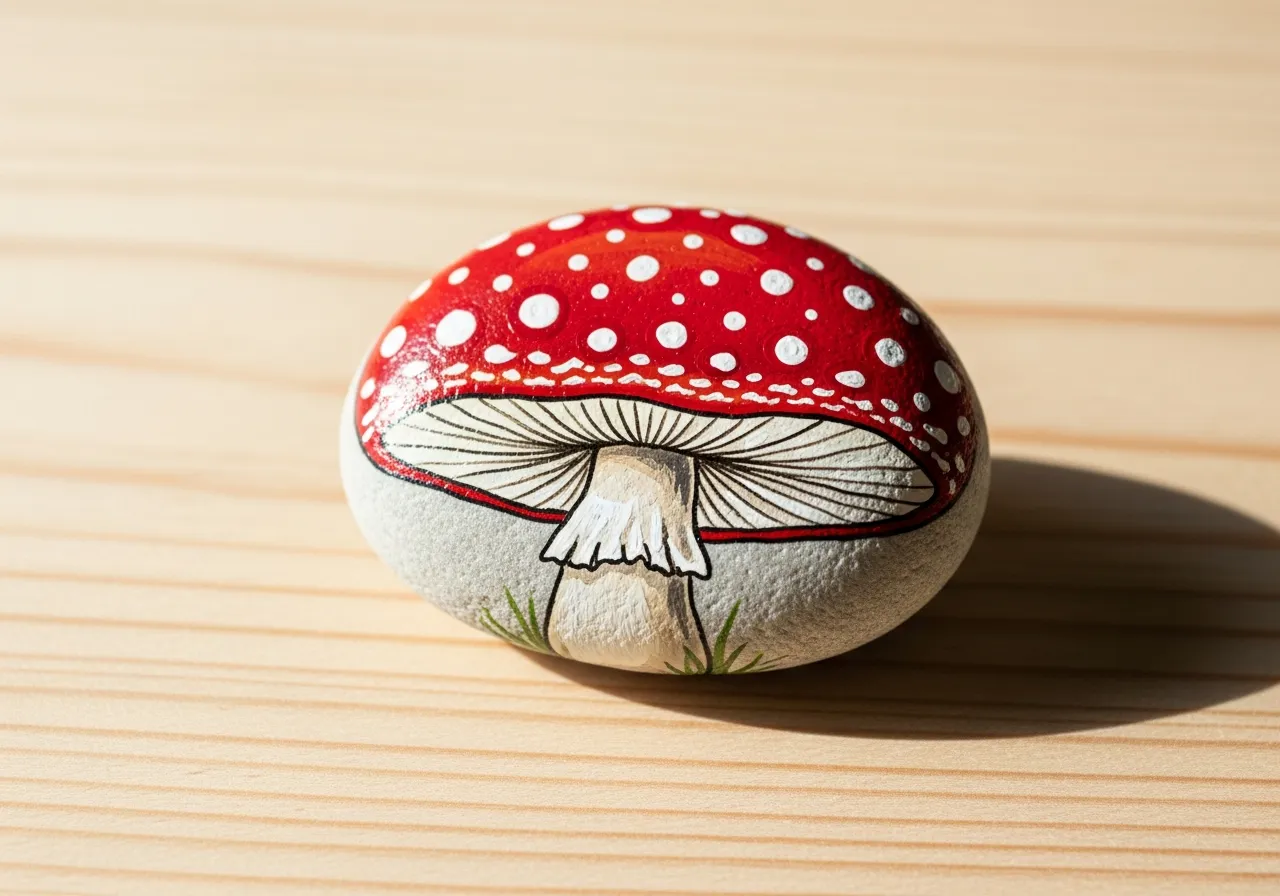
Pintura de Hongo en Piedra
Materiales necesarios
- Piedra redonda con forma de domo
- Pintura acrílica roja
- Pintura acrílica blanca
- Pintura acrílica marrón
- Pintura acrílica verde
- Pincel plano mediano
- Pincel fino de detalle
- Spray sellador transparente
Guía paso a paso
1
Paso 1: Prepare the rock
Wash your rock with soap and water and let it dry completely. A round or slightly dome-shaped rock works best for a mushroom. Cover your workspace with newspaper.
2
Paso 2: Paint the mushroom cap
Paint the upper two-thirds of the rock with red acrylic paint. Apply two coats for a rich, even color. The dome shape of the rock will naturally look like a mushroom cap.
3
Paso 3: Add white dots
Once the red paint is dry, dip the end of your brush handle or a pencil eraser in white paint and stamp round dots across the red cap. Space them randomly for a natural toadstool look.
4
Paso 4: Paint the stem
Paint the lower third of the rock white or light beige for the mushroom stem. Keep the border between the cap and stem neat. You can add a small curved line for the stem ring.
5
Paso 5: Add details and seal
Optionally add tiny green grass blades at the base with green paint. Once everything is dry, spray with clear sealant to protect your mushroom rock from the weather.
Paso 6: Agregar código RoxGeo
Escribe ROXGEO.COM seguido de una barra y el código único de tu piedra (ej. ROXGEO.COM/ABC123) en la parte inferior o trasera de tu piedra.
Consejos útiles
- Elige una forma de piedra que se ajuste a tu diseño.
- Una capa base blanca hace que todos los colores se vean más vivos.
- Deja secar completamente cada capa antes de añadir la siguiente.
- Sella con spray transparente para proteger tu piedra en exteriores.
- Para el código RoxGeo en la parte trasera, usa un marcador permanente resistente al agua. Aplica 2-3 capas de barniz transparente encima.
- Escribir #ROXCODE (ej. #ROXABC123) en tu piedra lo hace fácil de encontrar en Google.
- La dirección completa ROXGEO.COM/CODE lleva al descubridor directamente al mapa de tu piedra.
¡Pinta esta piedra y rastrea su viaje con RoxGeo!
Descargar RoxGeo gratis


