Volver a plantillas
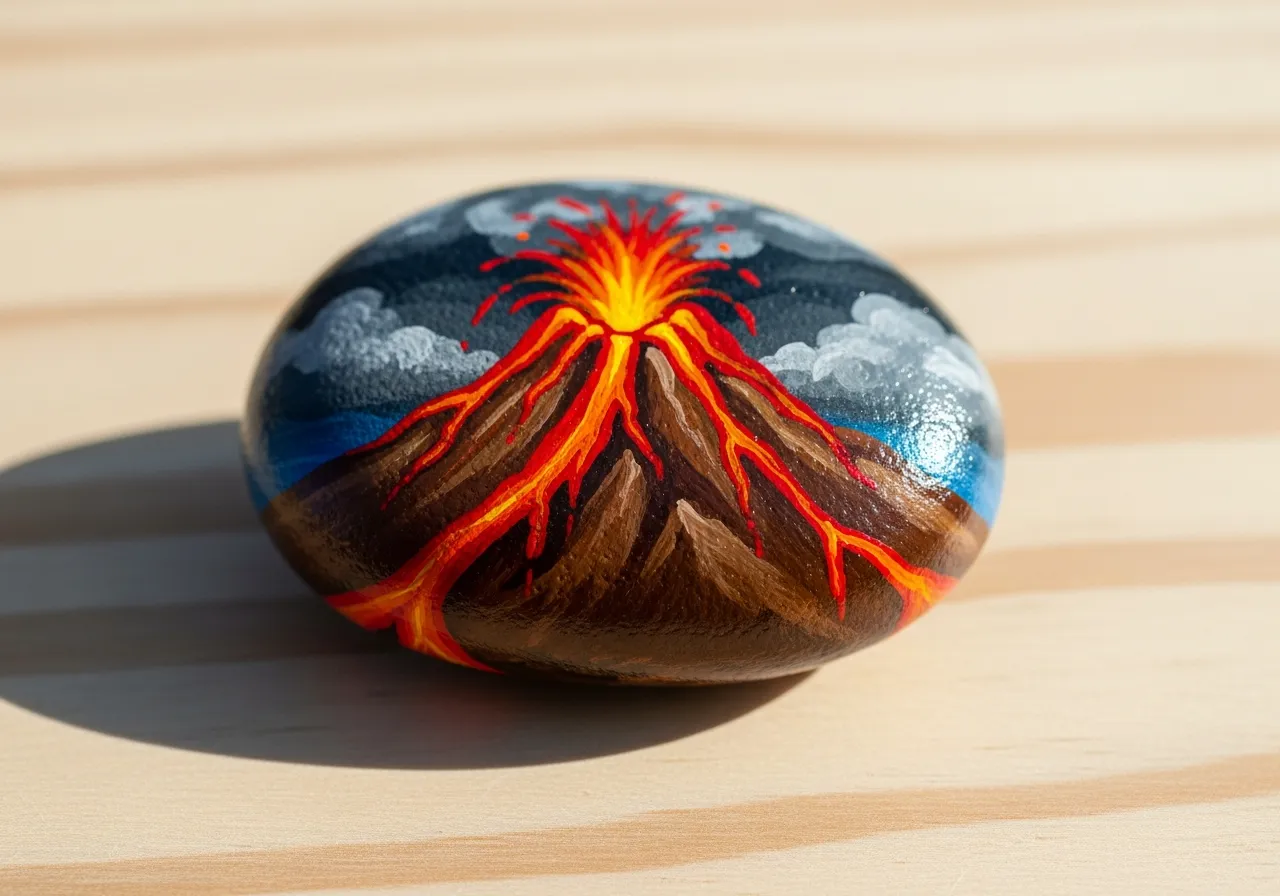
Pintura de Volcán en Piedra
Materiales necesarios
- Piedra alta y oval
- Pintura acrílica marrón
- Pintura acrílica naranja
- Pintura acrílica roja
- Pintura acrílica negra
- Pintura acrílica amarilla
- Pincel plano mediano
- Pincel fino de detalle
- Spray sellador transparente
Guía paso a paso
1
Paso 1: Prepare and sketch
Wash and dry your rock. A triangular or cone-shaped rock works best for a volcano. Use a pencil to divide the rock into sections: the mountain base (bottom two-thirds) and the eruption area (top third).
2
Paso 2: Paint the mountain
Paint the lower portion of the rock with brown paint. Add darker brown or gray streaks along the sides to create depth and rocky texture. Blend the colors slightly where they meet for a natural look.
3
Paso 3: Create the lava flow
Starting from the top of the rock, paint streams of red and orange flowing down the sides. Make the lava thicker at the top and thinner as it flows down. Add yellow highlights in the center of the lava streams for a glowing effect.
4
Paso 4: Paint the eruption
At the very top, paint a bright explosion of yellow and orange bursting upward. Add small red and orange dots flying outward from the crater to represent volcanic debris. Use black to outline the crater opening.
5
Paso 5: Add details and seal
Add smoke wisps with light gray paint above the eruption. Paint a few small rocks or boulders at the base using dark gray. Once fully dry, apply clear sealant to preserve your erupting volcano.
Paso 6: Agregar código RoxGeo
Escribe ROXGEO.COM seguido de una barra y el código único de tu piedra (ej. ROXGEO.COM/ABC123) en la parte inferior o trasera de tu piedra.
Consejos útiles
- Elige una forma de piedra que se ajuste a tu diseño.
- Esboza el diseño a lápiz antes de empezar a pintar.
- Deja secar completamente cada capa antes de añadir la siguiente.
- Sella con spray transparente para proteger tu piedra en exteriores.
- Para el código RoxGeo en la parte trasera, usa un marcador permanente resistente al agua. Aplica 2-3 capas de barniz transparente encima.
- Escribir #ROXCODE (ej. #ROXABC123) en tu piedra lo hace fácil de encontrar en Google.
- La dirección completa ROXGEO.COM/CODE lleva al descubridor directamente al mapa de tu piedra.
¡Pinta esta piedra y rastrea su viaje con RoxGeo!
Descargar RoxGeo gratis