Torna ai modelli
Pittura Mosaico su Sasso
Materiali necessari
- Sasso grande e piatto
- Colori acrilici assortiti vivaci
- Colore acrilico nero
- Colore acrilico bianco
- Pennello fine per i dettagli
- Pennello piatto medio
- Spray sigillante trasparente
- Matita
Guida passo passo
1
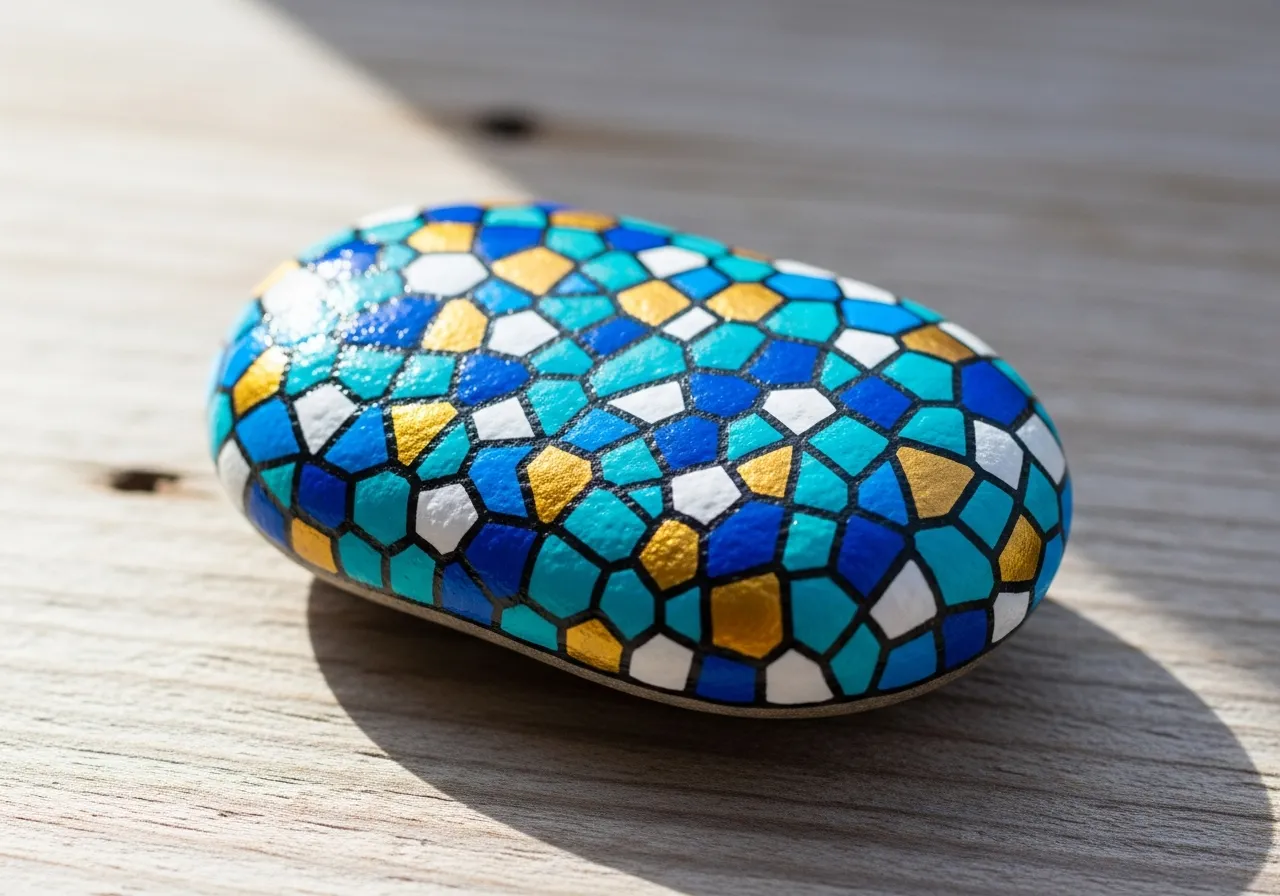
Passo 1: Prepare and plan your design
Wash and dry the rock. Using a pencil, divide the rock surface into irregular geometric shapes - triangles, squares, diamonds, and trapezoids. The shapes should fit together like tiles with small gaps between them.
2
Passo 2: Paint the base white
Paint the entire rock surface white as a base coat. This helps the mosaic colors appear brighter and more vivid. Let it dry completely, then redraw your mosaic lines with pencil if needed.
3
Passo 3: Fill in the tiles
Choose a color scheme - warm colors, cool colors, or a rainbow palette. Paint each tile shape with a different color, making sure no two adjacent tiles share the same color. Use your flat brush for larger shapes and the detail brush for small ones.
4
Passo 4: Add black outlines
Once all tile colors are dry, use your fine brush and black paint to carefully outline each tile. Keep the lines thin and consistent. The black outlines create the classic mosaic "grout" look that makes each tile stand out.
5
Passo 5: Add highlights and seal
For a polished look, add a tiny white highlight dot to the corner of each tile. This creates a 3D glass effect. Let everything dry fully, then apply clear sealant spray to protect your mosaic masterpiece.
Passo 6: Aggiungi codice RoxGeo
Scrivi ROXGEO.COM seguito da una barra e il codice unico del tuo sasso (es. ROXGEO.COM/ABC123) sul fondo o sul retro del sasso.
Consigli utili
- Scegli una forma di sasso che si adatti al tuo soggetto.
- Abbozza il disegno a matita prima di iniziare a dipingere.
- Lascia asciugare completamente ogni strato prima di aggiungere il successivo.
- Applica il sigillante spray per proteggere il tuo sasso anche all'esterno.
- Per il codice RoxGeo sul retro, usa un pennarello permanente resistente all'acqua. Applica 2-3 strati di vernice trasparente sopra.
- Scrivere #ROXCODE (es. #ROXABC123) sul tuo sasso lo rende facile da trovare su Google.
- L'indirizzo completo ROXGEO.COM/CODE porta lo scopritore direttamente alla mappa del tuo sasso.
Dipingi questo sasso e traccia il suo viaggio con RoxGeo!
Scarica RoxGeo gratis


