กลับไปที่แม่แบบ
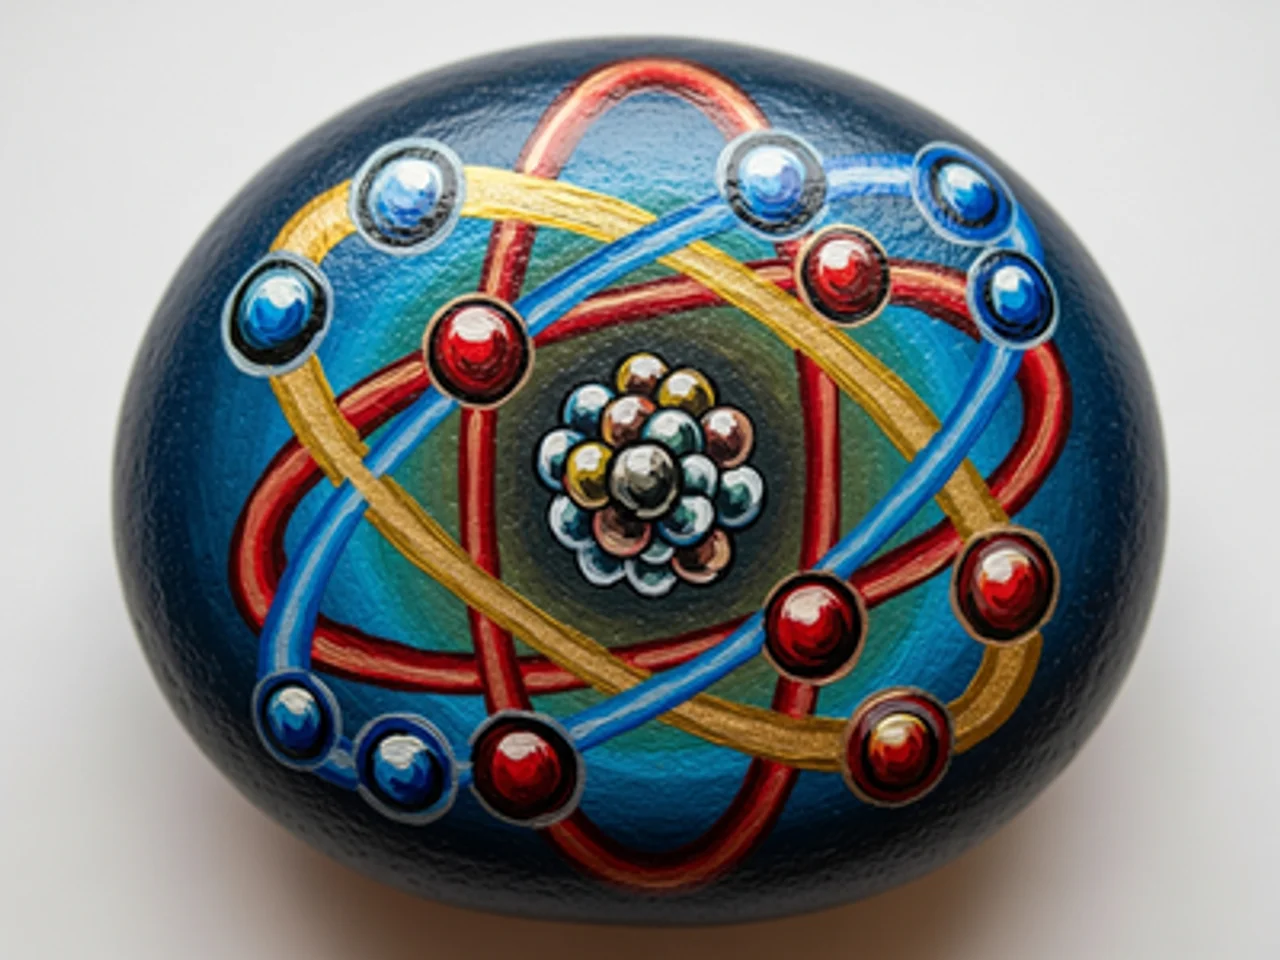
วาดแบบจำลองอะตอมบนหิน
วัสดุที่ต้องการ
- หินเรียบกลม (ขนาดฝ่ามือ)
- สีอะคริลิกสีดำ
- สีอะคริลิกสีน้ำเงินเข้ม
- สีอะคริลิกสีขาว
- สีอะคริลิกสีแดง
- แปรงแบนขนาดกลาง
- แปรงเล็กสำหรับรายละเอียด
- สเปรย์เคลือบใส
- ดินสอ
คำแนะนำทีละขั้นตอน
1
ขั้นตอน 1: Paint the dark background
Wash and dry your rock. Paint the entire surface with deep navy blue or black. Tiny white dot stars can be added for a scientific-meets-cosmic feel. The dark background makes the glowing orbital lines and electrons stand out dramatically.
2
ขั้นตอน 2: Draw and paint the nucleus
In the center of the rock, paint a cluster of tightly packed dots for the nucleus: some red (protons) and some white or gray (neutrons). The nucleus should be a dense, compact cluster suggesting the tight packing of nuclear particles. It should be notably smaller than the orbital rings around it.
3
ขั้นตอน 3: Paint the electron orbital rings
Using teal or turquoise paint and a fine brush, paint two or three elliptical orbital rings around the nucleus at different angles. Each ring is a thin, complete ellipse. Like a gyroscope, the rings should be oriented differently — one horizontal, one tilted left, one tilted right — to create a three-dimensional spherical appearance.
4
ขั้นตอน 4: Add the electrons
Paint one small bright yellow or gold dot on each orbital ring to represent an electron. Position them at different points along each ring — not all at the same angle. Each electron should glow slightly by adding a tiny white highlight dot inside the yellow dot.
5
ขั้นตอน 5: Add glow effects and seal
Using very diluted white paint, add a soft glow halo around the nucleus. Add thin light-colored trailing lines behind each electron to suggest orbital movement. Apply clear sealant when fully dry for a polished finish on your atom model rock.
ขั้นตอน 6: เพิ่มรหัส RoxGeo
ที่ด้านล่างหรือด้านหลังของหินของคุณ เขียน ROXGEO.COM ตามด้วยเครื่องหมายทับและรหัสเฉพาะของหินของคุณ (เช่น ROXGEO.COM/ABC123) สิ่งนี้จะทำให้ผู้ที่พบสามารถไปยังหน้าประวัติของหินของคุณและบันทึกการค้นพบของพวกเขาได้โดยตรง หากหินมีขนาดเล็กเกินไปสำหรับที่อยู่ทั้งหมด ให้เขียน #ROX ตามด้วยรหัสโดยไม่มีช่องว่าง (เช่น #ROXABC123) — มันสั้น ง่ายต่อการค้นหาบน Google และนำไปยังหน้าการเดินทางของหินของคุณโดยตรง ใช้ปากกาแบบถาวรที่มีปลายเล็กหรือปากกาสีอะคริลิก และเคลือบด้วยน้ำยาล้างเงาใสเพื่อให้รหัสอ่านได้แม้ในฝน แดด และการผจญภัย
เคล็ดลับที่เป็นประโยชน์
- ชั้นรองพื้นสีขาวทำให้สีทุกสีดูสดใสยิ่งขึ้น
- ร่างดีไซน์ด้วยดินสอก่อนเริ่มระบายสี
- ให้แต่ละชั้นแห้งสนิทก่อนเพิ่มชั้นถัดไป
- เคลือบด้วยสเปรย์ใสเพื่อปกป้องหินเมื่อใช้งานกลางแจ้ง
- สำหรับรหัส RoxGeo ที่ด้านล่าง ใช้ปากกาถาวรที่กันน้ำ (เช่น Sharpie) หรือปากกาสีอะคริลิก ทาเคลือบใส 2–3 ชั้นเหนือรหัส — สิ่งนี้จะช่วยให้รหัสอ่านได้แม้ในฝน แดด และการสัมผัสเป็นเวลาหลายเดือน
- การเขียน #ROXCODE (เช่น #ROXABC123) บนหินของคุณทำให้ค้นหาได้ง่ายผ่านการค้นหาบน Google เราได้ทำการปรับแต่งสำหรับแฮชแท็กนี้อย่างต่อเนื่อง ดังนั้นใครก็ตามที่ค้นหาจะพบหน้าประวัติของหินของคุณได้อย่างรวดเร็ว
- ที่อยู่เต็ม ROXGEO.COM/CODE จะนำผู้ที่พบไปยังการ์ดของหินของคุณโดยตรง ที่ซึ่งพวกเขาสามารถดูประวัติการเดินทางทั้งหมด ผู้ที่พบก่อนหน้า และภาพถ่ายจากทุกจุดที่หินของคุณไปถึง
เพ้นท์หินนี้และติดตามการเดินทางของมันด้วย RoxGeo!
ดาวน์โหลด RoxGeo ฟรี