Volver a plantillas
Pintura Modelo Átomo en Piedra
Materiales necesarios
- Piedra lisa y redonda (tamaño palma)
- Pintura acrílica negra
- Pintura acrílica azul oscuro
- Pintura acrílica blanca
- Pintura acrílica roja
- Pincel plano mediano
- Pincel fino de detalle
- Spray sellador transparente
- Lápiz
Guía paso a paso
1
Paso 1: Paint the dark background
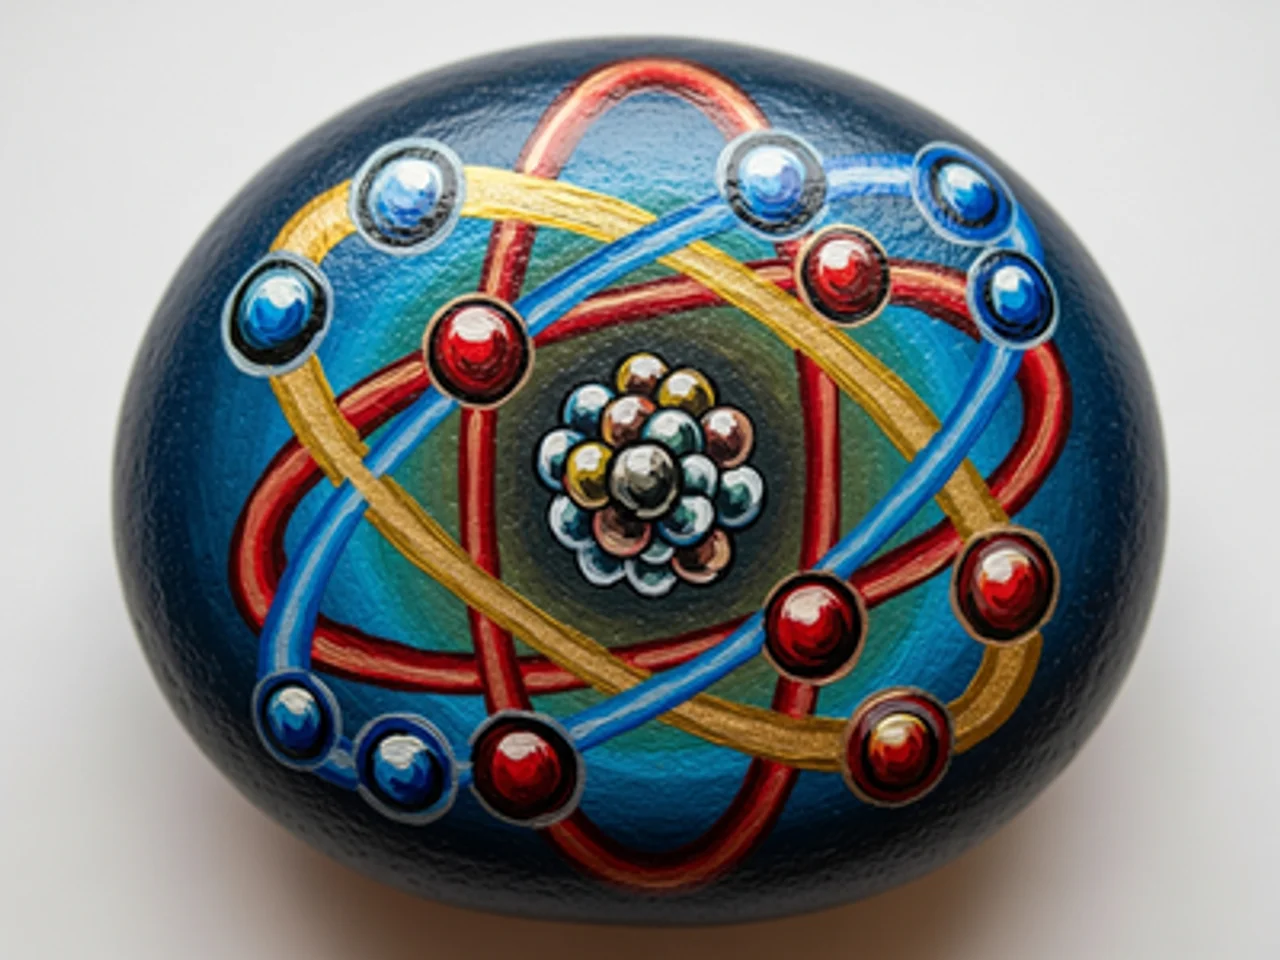
Wash and dry your rock. Paint the entire surface with deep navy blue or black. Tiny white dot stars can be added for a scientific-meets-cosmic feel. The dark background makes the glowing orbital lines and electrons stand out dramatically.
2
Paso 2: Draw and paint the nucleus
In the center of the rock, paint a cluster of tightly packed dots for the nucleus: some red (protons) and some white or gray (neutrons). The nucleus should be a dense, compact cluster suggesting the tight packing of nuclear particles. It should be notably smaller than the orbital rings around it.
3
Paso 3: Paint the electron orbital rings
Using teal or turquoise paint and a fine brush, paint two or three elliptical orbital rings around the nucleus at different angles. Each ring is a thin, complete ellipse. Like a gyroscope, the rings should be oriented differently — one horizontal, one tilted left, one tilted right — to create a three-dimensional spherical appearance.
4
Paso 4: Add the electrons
Paint one small bright yellow or gold dot on each orbital ring to represent an electron. Position them at different points along each ring — not all at the same angle. Each electron should glow slightly by adding a tiny white highlight dot inside the yellow dot.
5
Paso 5: Add glow effects and seal
Using very diluted white paint, add a soft glow halo around the nucleus. Add thin light-colored trailing lines behind each electron to suggest orbital movement. Apply clear sealant when fully dry for a polished finish on your atom model rock.
Paso 6: Agregar código RoxGeo
Escribe ROXGEO.COM seguido de una barra y el código único de tu piedra (ej. ROXGEO.COM/ABC123) en la parte inferior o trasera de tu piedra.
Consejos útiles
- Una capa base blanca hace que todos los colores se vean más vivos.
- Esboza el diseño a lápiz antes de empezar a pintar.
- Deja secar completamente cada capa antes de añadir la siguiente.
- Sella con spray transparente para proteger tu piedra en exteriores.
- Para el código RoxGeo en la parte trasera, usa un marcador permanente resistente al agua. Aplica 2-3 capas de barniz transparente encima.
- Escribir #ROXCODE (ej. #ROXABC123) en tu piedra lo hace fácil de encontrar en Google.
- La dirección completa ROXGEO.COM/CODE lleva al descubridor directamente al mapa de tu piedra.
¡Pinta esta piedra y rastrea su viaje con RoxGeo!
Descargar RoxGeo gratis