Volver a plantillas
Pintura de Mosaico en Piedra
Materiales necesarios
- Piedra grande y plana
- Pinturas acrílicas variadas y brillantes
- Pintura acrílica negra
- Pintura acrílica blanca
- Pincel fino para detalles
- Pincel plano mediano
- Spray sellador transparente
- Lápiz
Guía paso a paso
1
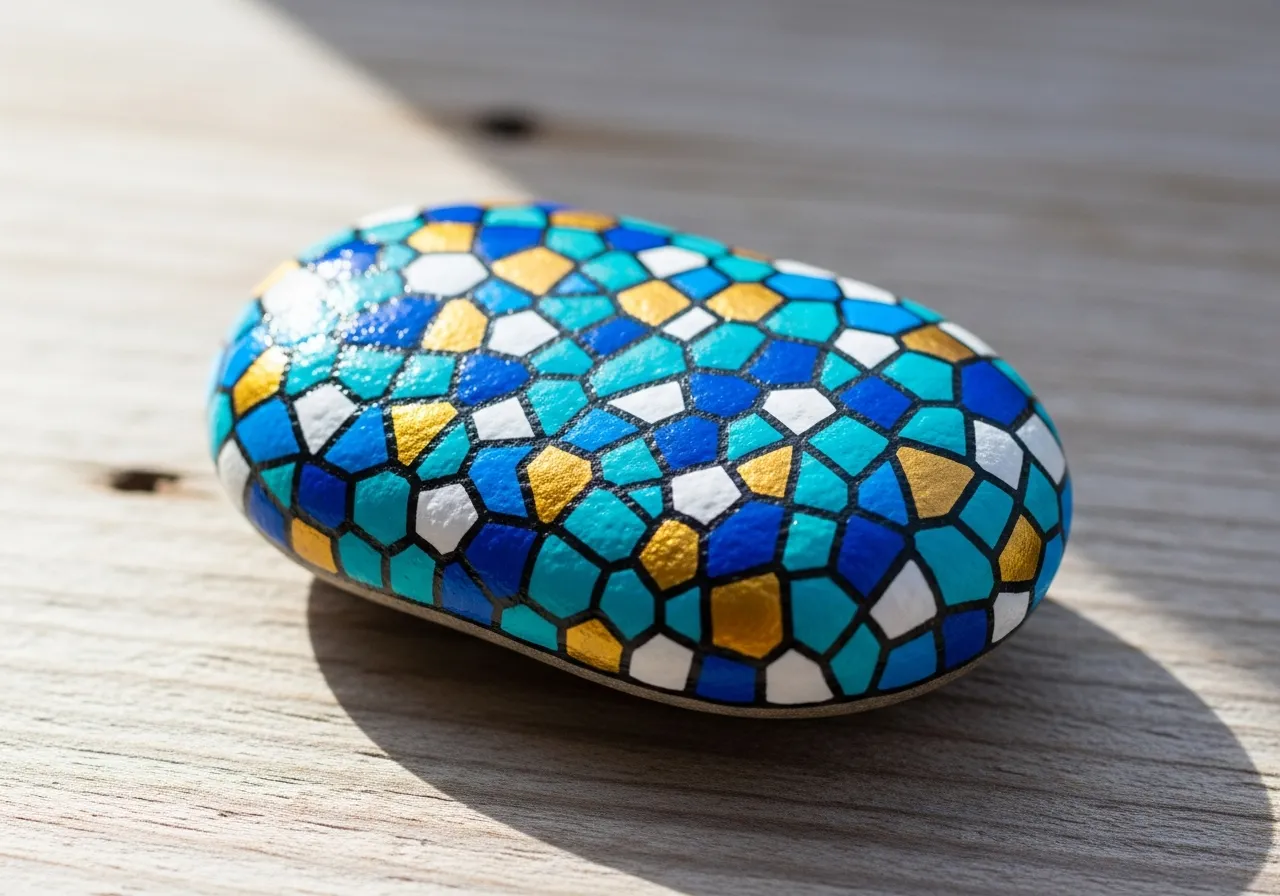
Paso 1: Prepare and plan your design
Wash and dry the rock. Using a pencil, divide the rock surface into irregular geometric shapes - triangles, squares, diamonds, and trapezoids. The shapes should fit together like tiles with small gaps between them.
2
Paso 2: Paint the base white
Paint the entire rock surface white as a base coat. This helps the mosaic colors appear brighter and more vivid. Let it dry completely, then redraw your mosaic lines with pencil if needed.
3
Paso 3: Fill in the tiles
Choose a color scheme - warm colors, cool colors, or a rainbow palette. Paint each tile shape with a different color, making sure no two adjacent tiles share the same color. Use your flat brush for larger shapes and the detail brush for small ones.
4
Paso 4: Add black outlines
Once all tile colors are dry, use your fine brush and black paint to carefully outline each tile. Keep the lines thin and consistent. The black outlines create the classic mosaic "grout" look that makes each tile stand out.
5
Paso 5: Add highlights and seal
For a polished look, add a tiny white highlight dot to the corner of each tile. This creates a 3D glass effect. Let everything dry fully, then apply clear sealant spray to protect your mosaic masterpiece.
Paso 6: Agregar código RoxGeo
Escribe ROXGEO.COM seguido de una barra y el código único de tu piedra (ej. ROXGEO.COM/ABC123) en la parte inferior o trasera de tu piedra.
Consejos útiles
- Elige una forma de piedra que se ajuste a tu diseño.
- Esboza el diseño a lápiz antes de empezar a pintar.
- Deja secar completamente cada capa antes de añadir la siguiente.
- Sella con spray transparente para proteger tu piedra en exteriores.
- Para el código RoxGeo en la parte trasera, usa un marcador permanente resistente al agua. Aplica 2-3 capas de barniz transparente encima.
- Escribir #ROXCODE (ej. #ROXABC123) en tu piedra lo hace fácil de encontrar en Google.
- La dirección completa ROXGEO.COM/CODE lleva al descubridor directamente al mapa de tu piedra.
¡Pinta esta piedra y rastrea su viaje con RoxGeo!
Descargar RoxGeo gratis


